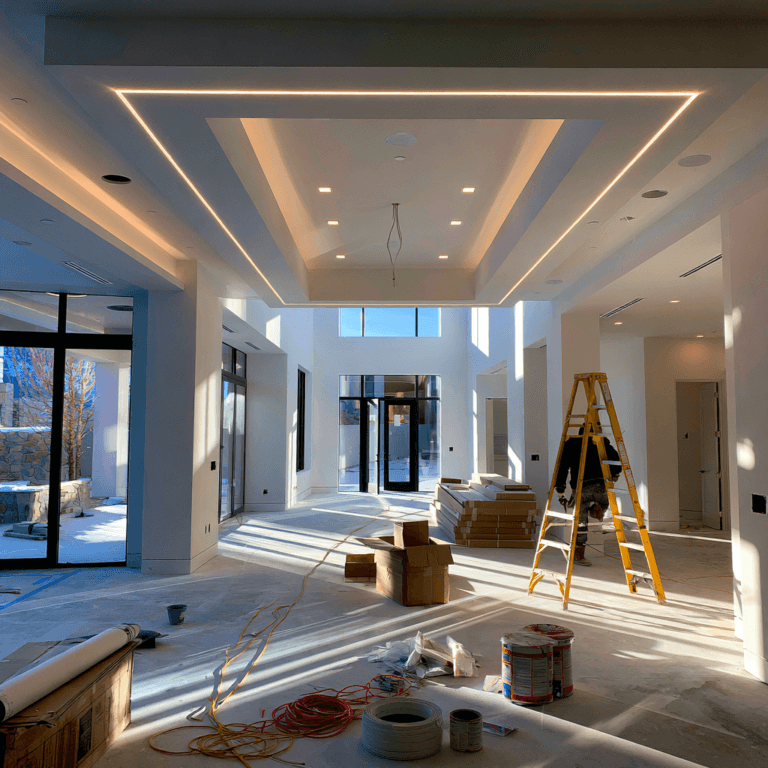


You wreck a paint job before opening the can when you rush prep. Dust, grease, loose paint, glossy spots, and damp patches impede adhesion, leading to peeling, flashing, lap marks, and visible repairs. You need to clear the room, protect the floors, clean the walls, scrape off weak paint, patch defects, sand smooth, prime porous or stained areas, and tape edges tightly. Do this first, and your finish bonds better, covers cleaner, and lasts longer. Here’s how to get it right.
Why Wall Prep Matters Before Painting
Why does wall prep matter so much before painting? You create the surface your finish depends on. When you clean, sand, patch, and prime with intent, you give modern coatings the conditions they need to bond evenly, level smoothly, and reflect color accurately. A proper workflow helps you move from inspection to repair to masking without wasting time or having to redo steps. You also confirm material readiness: fillers are cured, primers match the substrate, tape holds clean edges, and tools fit the wall texture. This planning turns painting from a cosmetic task into a controlled system. You reduce guesswork, improve coverage, and make each coat perform as designed. If you want sharper results with smarter products, prep is where that innovation starts.
What Can Go Wrong If You Skip Prep?
What happens when you skip prep? You turn paint into a temporary skin, not a durable finish. Dust, grease, and old residue block adhesion, so fresh coats peel, blister, or flash unevenly under changing light. Hairline cracks widen because you didn’t stabilize them. Nail pops and dents telegraph through premium paint, wasting high-performance coatings. You also create timing pitfalls: wet patches, unfilled gaps, or glossy spots force stop-start corrections after rolling begins. That disrupts drying windows and can leave lap marks or texture mismatches. Small defects become cost overruns when you must sand, patch, re-prime, and repaint entire sections instead of touching up one spot. Skipping prep doesn’t save time; it transfers labor into failure recovery, where every fix takes longer and looks less predictable today.
Get the Room Ready for Paint Prep
Before you touch sandpaper or spackle, set the room up so prep work stays controlled, clean, and efficient. Start with a preparation mindset: you’re building a workflow, not just clearing space. Move furniture out or cluster it centrally, then cover it tightly. Remove outlet plates, switch covers, curtains, hardware, and wall-mounted items to ensure every pre-paint surface remains accessible.
- Map your work zone and keep tools within arm’s reach.
- Lay drop cloths edge-to-edge, not loosely overlapped.
- Tape the floor edges, trim the borders, and fix the features cleanly.
- Set lighting at angles to reveal dents, seams, and texture shifts.
You’ll work faster when the room functions like a controlled lab. A good setup reduces missed defects, protects finishes, and keeps each repair step measurable.
Clean Walls Before Painting
Before you paint, you need to clear dust, cobwebs, and surface grime so the coating can bond evenly. Wipe walls with a damp microfiber cloth or sponge, then rinse away cleaner residue that can weaken adhesion. Degrease high-touch areas like door frames, switch plates, corners, and kitchen walls because paint won’t grip oily buildup.
Remove Dust And Grime
Even if your walls look clean, dust, cooking residue, hand oils, and airborne grime can sit on the surface and weaken paint adhesion. You need systematic grime removal before primer or paint is applied to drywall, plaster, or trim. Use dust-filtration thinking: capture particles rather than spreading them.
- Start high, using a microfiber duster or vacuum brush with HEPA filtration.
- Wipe walls with a barely damp microfiber cloth, rinsing it often.
- Work in overlapping vertical passes so you don’t leave any bands untreated.
- Let the surfaces dry fully, then inspect them with an angled light for any remaining residue.
Don’t flood the wall; excess moisture can raise fibers, soften patches, or push contaminants deeper. A clean, dry surface lets modern coatings bond evenly, cure predictably, and deliver a smoother, longer-lasting finish.
Degrease High-Touch Areas
After general dust and grime removal, target the spots that collect skin oils and sticky residue: around light switches, door frames, cabinet edges, stair rails, thermostat areas, and children’s hand-height zones. Use a microfiber cloth with warm water and a small amount of pH-neutral degreaser. Work in tight sections, wiping upward to prevent dirty streaks. For smart-home panels or outlets, spray the cloth, not the wall, to control moisture. Rinse with a clean, damp cloth, then dry immediately so the primer bonds evenly. This step helps you degrease high-touch areas without dulling existing finishes or pushing residue deeper. If you need to sanitize walls before painting, choose a residue-free cleaner and follow dwell times. Let every treated area fully dry before sanding, patching, or priming.
Scrape Away Loose or Peeling Paint
Why does loose paint need to come off first? Because new coatings perform like smart systems: they need stable data, or in this case, a stable surface. If you paint over failing layers, adhesion breaks, edges telegraph through, and your finish flakes early. Before you scrape paint, assess peeling under strong side lighting so raised edges cast shadows.
- Press painter’s tape onto suspect areas, then pull sharply to reveal weak spots.
- Use a stiff putty knife or paint scraper at a low angle.
- Work outward until you reach firmly bonded paint.
- Feather stubborn edges lightly with sanding, not force.
Keep the tool controlled, not aggressive. You’re removing failure, not gouging the wall. Vacuum dust as you go, so the next prep step starts clean.
Patch Cracks, Holes, and Dents
How do small wall flaws turn into obvious finish defects? Paint magnifies edges, shadows, and texture changes, so you need to patch cracks and holes before any coating goes on. Use a flexible filler for hairline cracks, pressing it deep with a putty knife rather than skimming the surface. For nail holes, overfill slightly so shrinkage doesn’t leave a crater. Larger holes need mesh or a backing patch, not just compound packed into empty space.
For dent removal, identify crushed drywall paper, soft spots, and surface dents from furniture or impact. Cut away loose paper, seal exposed gypsum if needed, then fill in thin layers. Use quick-setting compounds when you want faster workflow control. Let each repair fully cure, because trapped moisture can blister the primer and distort your final color.
Sand Rough Spots Smooth
You need to sand patched areas until raised ridges, dried compound bumps, and rough paint edges sit flush with the wall. Use light pressure and fine-grit sandpaper so you don’t gouge the surface or expose the patch. Feather each edge outward evenly to prevent visible lines from showing through the new paint.
Remove Raised Imperfections
Once the wall is clean and patched, check for raised edges, dried drips, joint compound ridges, and rough paint buildup that will show through the new coat. You need to remove raised defects before primer locks them into the surface texture. Use a sanding sponge, fine-grit paper, or a compact detail sander for controlled removal.
- Rake light across the wall to reveal high spots.
- Sand only the raised area with steady, flat pressure.
- Wipe away the dust and inspect the patch’s consistency.
- Reapply compound only where you still need to fill imperfections.
Don’t chase perfection by gouging the wall. Let your tools skim, not dig. When the surface feels uniform under your fingertips, you’ve created a cleaner base for advanced primers and smoother paint performance.
Feather Edges Evenly
Why do edges matter so much after patching? Because paint magnifies sudden height changes. You need to feather edges until the repair disappears into the surrounding wall. Use a fine-grit sanding sponge or dust-extracting orbital sander, then work outward from the patch with light, controlled passes. Don’t grind the center; taper the perimeter. Your goal is to make even transitions that your hand can’t detect.
Check progress with a raking light or phone flashlight held flat to the surface. Shadows reveal ridges before primer locks them in. Wipe dust with a microfiber cloth, then skim tiny low spots if needed. Smart prep means fewer coats, sharper color, and a smoother finish. When you sand rough spots smooth, you turn a visible repair into a seamless surface.
Know When Walls Need Primer
A quality primer gives paint the grip and uniform surface it needs, but not every wall requires it. You choose primer timing by reading the surface, not the clock. Test wall adhesion by rubbing, spotting sheen changes, and checking repairs.
- Use primer on new drywall, where joint compound drinks paint differently than paper.
- Prime patched areas after feathering, especially if filler feels chalky or porous.
- Seal stains, smoke, marker, or water marks so they don’t telegraph through.
- Apply bonding primer over glossy, slick, or previously oil-based coatings after scuff-sanding.
Skip primer on clean, dull, sound latex paint when you’re using a similar color and finish. Smart prep saves material, improves coverage, and helps advanced coatings cure into a tougher, smoother film.
Tape, trim, and Cover Floors Properly
You need quality painter’s tape to seal clean edges along trim, baseboards, and window frames without pulling up fresh finish. Press the tape firmly with a putty knife, then cover the floors with canvas drop cloths and move or wrap furniture before you open the paint can. Don’t rely on thin plastic alone where you’ll walk, because it shifts, tears, and tracks wet paint.
Choose Quality Painter’s Tape
Before the roller ever touches the wall, quality painter’s tape gives your edges a clean line and protects trim, outlets, baseboards, and built-ins from messy bleed-through. Choose tape engineered for your surface: delicate finishes need low-tack adhesion, while textured trim may require a stronger grip. Smart tape application starts with dry, dust-free edges and firm pressure along the seal.
- Match adhesion level to paint age, sheen, and substrate.
- Run tape in short, controlled sections to prevent stretching.
- Burnish the edge with a putty knife for a micro-seal.
- Remove the tape while the paint is slightly wet for a crisp release.
You’ll save touch-up time, reduce rework, and create sharper transitions. Don’t use bargain tape; it can lift the finish, leak pigment, or shred during removal.
Protect Floors And Furniture
Once your tape lines are set, protect the wider work area so drips, sanding dust, and roller spatter don’t ruin floors or furniture. Move lightweight pieces out; cluster heavy furniture at the room’s center and wrap it tightly with plastic. Use canvas drop cloths for traffic paths and add leak-resistant film or rosin paper beneath them for enhanced protection of hardwood, tile, or polished concrete. Overlap seams by several inches, then tape edges flat so you don’t trip or drag paint onto clean surfaces. Cover vents, built-ins, and electronics before sanding. Don’t rely on thin sheets alone; they shift, tear, and create preparation missteps that cost time. Create a clean staging zone for tools, lids, and rollers, so every move stays controlled.
Follow This Pre-Paint Prep Checklist
Why risk a rough finish when a clear prep routine can prevent most paint problems? Use this checklist before you open the can, and you’ll control dust, moisture, adhesion, and timing effects that weaken coverage.
- Inspect surfaces: mark cracks, nail pops, glossy spots, and stains; confirm repairs before sanding.
- Clean aggressively: degrease walls, rinse off any residue, and let every area dry completely.
- Sand and prime: feather edges, remove dust with a tack cloth, then apply targeted primer.
- Stage materials: stir idle pigments back into paint, label tools, test lighting, and set cure windows.
You’re building a smarter workflow, not just painting faster. When each step is verified, you finish levels better, bonds stronger, and resists early peeling. Keep this checklist visible until the final coat.
Frequently Asked Questions
How Long Should Wall Prep Take Before Painting?
Wall prep should take you 4–24 hours, depending on the damage, dirt, drying time, and repairs. For smooth walls, you’ll clean, patch, sand, and tape in half a day. For cracks, stains, or glossy paint, you’ll need a full day, sometimes longer. Use smart prep timelines: clean first, repair next, sand, prime, then paint. Among two-word discussion ideas, “surface readiness” best guides your timing, results, and paint durability.
Can I Paint Over Wallpaper After Basic Prep?
Yes, you can, but only if the wallpaper is tight, clean, smooth, and untextured. Don’t skip proper wallpaper prep: seal loose seams, remove bubbles, wash off residue, sand down glossy spots, and seal stains. Use an oil-based or shellac primer so moisture won’t reactivate adhesive. Painting over wallpaper works best when removal would damage drywall. If the paper lifts, smells musty, or has a heavy texture, strip it instead and start fresh.
What Temperature Is Best for Pre-Paint Preparation?
65–75°F is best for pre-paint preparation. You’ll get reliable temp control, predictable drying time, and better adhesion from cleaners, fillers, primers, and paint systems. Keep humidity around 40–50%, avoid drafts, and don’t prep cold walls, sun-heated surfaces, or damp rooms. Use a smart thermostat, hygrometer, or infrared thermometer to verify conditions. If temperatures swing, you’ll risk slow curing, flashing, bubbling, or weak bonding. Let surfaces stabilize first before starting.
Should I Hire a Professional for Wall Prep?
Yes, you should hire a professional if your walls show cracks, stains, peeling paint, moisture, or uneven texture. You’ll get a Professional assessment that identifies hidden issues before coating begins. Pros use better tools, dust control, fillers, primers, and Surface sealing methods to create a stable base. If you want smarter, longer-lasting results, you’ll save time, reduce rework, and avoid costly paint failure later down the line.
How Soon After Prep Can I Start Painting?
You can paint as soon as surfaces are clean, dry, smooth, and dust-free. How soon after prep depends on materials: wait 24 hours after patching compound, 2–4 hours after sanding and wiping, and the label’s cure time after primer. Test with your hand: no dampness, no grit, no soft spots. Use fast-dry fillers, moisture meters, and low-dust sanding systems if you want a smarter, quicker turnaround. Don’t rush—paint only when readiness checks pass.
Conclusion
Great paint starts long before you open the can. When you clear the room, clean the walls, scrape loose paint, sand rough spots, prime where needed, and tape with care, you give your finish a real chance to last. Why watch fresh color peel, bubble, or highlight every flaw after one weekend? Slow down, prep properly, and you’ll protect your walls, your time, and your budget while getting a smoother, cleaner, professional-looking result.